Friday, December 24, 2010

Merry Christmas Eve! Our Christmas Eve Breakfast

Traditions are an important element of the Christmas celebration; they are what makes the holiday a holiday. Growing up, my family had many Christmas traditions we held onto firmly, considering them sacred and unbreakable. Sure, my dad teased us often about opening presents Christmas morning instead of Christmas Eve (oh, the horror at even the mere mention!), or he would threaten not to make the usual Christmas Eve shopping trip and pizza buffet lunch... but we knew he would never seriously follow through. 

Because tradition is tradition

And because it wouldn't be Christmas without those traditions

I'm not a child anymore; I am married now and have my own child. The past several Christmases have been spent trying to sort through which family's traditions to keep, which ones to pass on, and which new ones to create. The last part has been the hardest. Our little family has spent a great deal of thought and energy in trying to satisfy both sets of in-laws (and will continue to do so, don't worry - extended family is worth every ounce of effort!) but we have neglected our own nucleus of father, mother, son (and soon son #2). 

That is changing this year. Of course, one year does not a new tradition create, but at least we are attempting to make special memories with our own little family, and hoping that one or more of these intentionally memory-making moments will become a tradition to last a lifetime... or at least until our children get married!

One of these memory-making moments took place this very morning. Christmas Eve morning seemed like the opportune moment to carve out a special time that was just us. There are no family obligations on either side for this portion of time, so I took advantage of that and made it ours: our own Christmas Eve breakfast. 

I will admit it wasn't easy, given our family's dietary issues, especially our Certain Little Someone's allergies. Most brunch and breakfast items involve wheat, eggs and dairy, all of them major no-nos. And I could never bring myself to make a special holiday meal that he couldn't eat. No way. It had to be safe for everyone. 

And yet special

Tall order!

I found the answer on my friend Robin's blog, Big Red Kitchen. She has been churning out some amazing ideas for the holidays in her Advent series, and this week she focused on some breakfast/brunch ideas. I was immediately attracted to her gorgeous Sausage Apple Ring. It fit all my requirements:
  • special enough for a holiday
  • delicious to everyone
  • easily adaptable to our diet


I pulled out all the stops: I molded the ring with my heart-shaped bundt pan, served all the food on our fine china (even for our Certain Little Someone!), and served hot chocolate topped with marshmallows to boot!

Here's my dietary-adjusted version of Robin's recipe. Feel free to try it or go for the original!

No-Wheat-No-Eggs Sausage Apple Ring
2 lbs bulk sausage
1 cup quick oats
1 apple, grated
1/2 cup apple cider or juice
1 tsp celery seed
1/2 tsp ground black pepper
Baked Apple Filling (I used this recipe)

Mix together the sausage, oats, apple, juice and seasonings. Stir together until thoroughly blended. Line a bundt pan with plastic wrap and press the sausage mixture firmly into it. Fold the ends of the plastic wrap over the surface of the sausage. Flip over onto a plate and refrigerate at least two hours, or overnight. 

To cook, line a cookie sheet with foil, then carefully slide or flip the sausage ring onto it. Cook at 350F for 50-60 minutes, or until browned. Carefully place cooked sausage ring onto serving platter and fill the hole in the middle with the apple filling. Slice and Serve!

We all enjoyed this very much! (Thanks, Robin!) Even my DH said to be sure and note that he thought it was very good

Was it QUICK? Not exactly, considering it takes quite a while to cook up in the oven. I did, however, find it incredibly convenient that I could mix it up the night before and then just slide into the oven in the morning. While it cooked, I made the rest of the meal (the apples, home fries, and hot chocolate). 

It was definitely EASY, though, but very impressive (a perfect combination for impressing your in-laws if you are hosting them!). 

CHEAP, not so much. I found the sausage on sale for a great price, but even at that it was still just under $5 for the 2 lbs. For a special Christmas tradition, though, I consider it money well spent! (If I bought the healthy sausage I would like to buy, it would be even more expensive - maybe next year!)

Perhaps not super HEALTHY, although I'm not one to run from the saturated fats found in sausage, bacon and the like. When it comes to those foods, I'm more concerned about the nitrates and nitrites and other non-food ingredients that go into them. To be really healthy, it should be made from homemade sausage or sausage that is nitrate-nitrite-free and all natural. 

Merry Christmas Eve!

Wednesday, December 22, 2010

Dark Chocolate Peppermint Fudge


A couple weeks ago, I shared with you my exciting new fudge recipe find, and promised to blog about a conventional (non-allergen-free) version within the week. Well, I did make the fudge last week, and it turned out great, but I just kept forgetting to blog about it. Silly me!

Better late than never, right? So here we are, two weeks later, with a peppermint version of my new favorite fudge recipe. If you're in need of a last-minute, super-fast Christmas treat for the fast-approaching holiday, this one's for you!

I made mine dark chocolate, but you can use any kind of baking chocolate you desire. Just remember, the darker, the healthier!

Dark Chocolate Peppermint Fudge
4 ounces unsweetened baking chocolate, chopped
12 ounces semi-sweet baking chocolate, chopped
3/4 cup heavy cream
1/2 tsp peppermint extract
pinch of salt
1/2 cup chopped peppermint candy

Microwave the unsweetened chocolate at 20-second intervals until melted and smooth, stirring in between. Line the bottom of a greased square pan with wax paper. Spread the melted chocolate in an even layer on the wax paper; refrigerate about 10 minutes until hardened.

While it's refrigerating, heat the semi-sweet baking chocolate and heavy cream in a double boiler, stirring until smooth and melted. Remove from heat and stir in peppermint extract and pinch of salt. Set aside to cool slightly.

Remove hardened dark chocolate from fridge. Pour cooled fudge mixture on top and smooth with a spatula. Press chopped peppermint into the top of the fudge mixture. Return to refrigerator and allow to chill for at least three hours.

After refrigerating, remove contents from pan by lifting the wax paper. Turn upside down onto cutting board, and carefully peel off the paper. Use a sharp small knife to score the bottom of the fudge bars into approximately 64 1″ squares. Once it is scored, use the knife to cut them apart. Allow fudge bars to stand at room temperature for a few minutes to soften before serving.

Tuesday, December 21, 2010

Frosted Window Panes: A Wintry Confection


Last year, I shared with you one of my family's favorite traditional Christmas cookies: Church Windows, a delicious - if decidedly unhealthy - confection made of chocolate chips and colored marshmallows. My Christmas baking list just doesn't seem complete without them, and there's simply no way to make them even remotely healthy, so I just make them the way they are and enjoy them! Once a year isn't going to kill me.

One problem, though. Those colored marshmallows are hard to find! And I certainly did not have time this year to go traipsing around the state looking for them, so I set my mind to coming up with an alternative.

Am I ever glad I did! While colored marshmallows could not be found anywhere, regular marshmallows were on sale all over the place, and I had coupons to boot. Not to mention all the chocolate chips I've been snagging for great prices! Not things I normally buy, but this is Christmas! A little indulgence makes it more of the celebration it should be.  


So without shame, I set forth to make these wintry confections: Frosted Window Panes, the cousins of Church Windows. They are snowy white with a caramel-colored crust resembling an old wooden window frame. They are sweet and decadent, meant to be eaten in very small doses, even richer than their traditional counterparts.

So rejoice! Even if you cannot find those elusive colored marshmallows, you can still make these beauties:


Frosted Window Panes
12 oz white chocolate chips
1/2 cup butter
1 tsp almond extract
2 beaten eggs
2 cups powdered sugar
1 pkg mini marshmallows
1 cup cookie crumbs

Melt the white chocolate chips and butter, with the almond extract, over medium heat, stirring all the while. Add the beaten eggs and powdered sugar and stir until thoroughly combined. Remove from heat and add the marshmallows.

Lay 2 sheets of wax paper on the counter (or in a cookie sheet) and cover each with the cookie crumbs. Spoon half the mixture on top of each. Shape gently with your hands into a log shape (it cools quickly, so you should be able to touch it safely). Use the wax paper to help you cover the log evenly with the cookie crumbs. Wrap the logs up tightly in the wax paper and then in a layer of foil. Freeze until firm. Once they're firm enough, slice to serve.


I used amaretto cookie crumbs, but I realize that they, like colored marshmallows, can be hard to find, so any light colored hard cookie will do: pecan sandies for example, or shortbread cookies. 


These are so QUICK, one reason why they are a favorite at Christmas! When my family was visiting a week or two ago, I literally had about 15 minutes to make these, and I did! Then they chilled in the freezer while we went out, so that when we came back, we had a great Christmas treat to go with our conversation for the rest of the evening. 


They are so EASY, too. Sometimes the mixture doesn't cooperate quite as well as it should, and you end up with misshapen hunks rather than nice round confections, but that doesn't really matter. The taste is the important part!


Not CHEAP, sorry, although I guess between the white chocolate chips, marshmallows, cookies and other ingredients, it cost no more than $3. For the amount of cookies it makes, that's pretty good although perhaps not exactly frugal. 


And definitely NOT HEALTHY! Not even remotely. But oh, so delicious...

Thursday, December 9, 2010

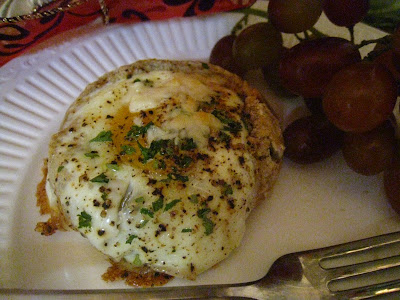
Put All Your Eggs in a Basket! Then Bake

When it comes to holidays and days off, I always think big breakfast. I don't know why that is, to be honest, because growing up I don't think my mom really made anything big or fancy for breakfast on holidays and days off. She DID make her famous Sticky Buns for Christmas, but that's all I remember.

At any rate, this time of year, I've been thinking a lot about yummy big breakfasts. I've already shared with you my idea for Festive French Toast, which was a delicious and easy adaptation of a traditional breakfast food.

Today, we're going in a slightly different and slightly more complicated direction, one that's definitely fit for a holiday! Holidays are meant to be special, so it's only fitting to take a little more time and effort (and perhaps even expense) than you would on just any ol' day.

Having said that, these little eggs-in-baskets still manage to fall more or less within my parameters of QUICK, EASY, CHEAP and HEALTHY. The big plus is that they are also elegant enough to serve to guests or to make any holiday special. Oh, and they're delicious, too: always very important!

So go put your eggs in baskets! Then bake. And proceed to have a very happy holiday.

Eggs in Baskets
For each serving, you will need:
1 dinner roll
1 egg
1 tsp heavy cream
1 tsp grated Parmesan
salt and pepper
a sprinkling of mixed herbs (suggestions: parsley, chives, tarragon, thyme)

Slice the tops off the dinner rolls, then use a grapefruit spoon (or your fingers) to gently remove the middle of each roll. Your goal is to create enough room to put an entire egg in the space, but leave the shell of the roll intact. Place the rolls on a greased cookie sheet. Crack one egg into each dinner roll, then carefully pour the cream  on top of the egg. Sprinkle each egg with salt and pepper, seasonings and Parmesan. Bake at 350F for about 20 minutes, or until the eggs are set and the bread is lightly toasted.

Serve with bacon, fresh fruit and yogurt.

I found this recipe to be very QUICK, actually. From beginning to end, it takes approximately half an hour. Perhaps that's too much to spare on a regular weekday morning, but for holidays, evenings or days off, it's just the right amount of time!

It's super EASY, too. I will tell you a little secret: my DH actually did most of it! I made the rolls and prepped them for him, but he did the rest. And he said it was easy, so I think it's pretty safe to say that it is easy indeed.

It's also very CHEAP, especially if you make your own rolls and find the eggs at a good price. Sure, heavy cream is expensive, but you don't need very much of it at all for this recipe (I currently get my cream at Costco for a great price. I don't remember exactly what it is, but I've noticed that their price for 1 quart is the same as many stores' price for a pint).

It's HEALTHY, too, IF you make your own rolls. Of course, store-bought white flour dinner rolls would look much more elegant, but I kind of like the rustic beauty of my homemade oat and whole wheat rolls.

Friday, December 3, 2010

QECH Gifts From Your Kitchen: Christmas Ornaments


This year, I'm attempting to make more of my gifts than I have before, both to save money and exercise my creative juices.

These little cinnamon ornaments make the perfect gift for Sunday School teachers, school teachers, coaches, music teachers, friends, etc. etc. You get the idea! They're also a great craft to make with the kids and get them involved in the giving spirit of the season.

Recipients will love them because they impart the most delicious cinnamon smell as they hang on the tree, year after year after year.

And the best part is: they cost next to nothing.

They DO take a LOT of cinnamon, considering one batch (resulting in about 6-8 ornaments, depending on the size) requires a full cup of the stuff. This is a good time of year, though, to find it on sale (don't forget to use a coupon! There are coupons out there right now for McCormick, Spice Island and Frontier spice brands.) OR you can buy it in bulk at Costco or another warehouse store. One cup is only about a quarter of the container of cinnamon I had in my cupboard from Costco, and though I bought it quite several months ago and don't remember the exact price I paid, the portion I used was definitely less than a dollar's worth.

 I made my own applesauce from apples that I bought at $0.99/lb, so again, less than $1 for the 3/4 cup of applesauce.

I used ribbon from my stash (which I buy on clearance after Christmas), and white glue from my stash (which I buy during back-to-school sales). My guess is that the most you'd end up paying for each of these ornaments is about $1: the perfect frugal gift!

Want to know how to make these little gems? Head on over to my guest post at Saving Naturally. Stephanie at Saving Naturally will be featuring a variety of make-your-own gifts as the season progresses, so continue to check her blog for more ideas.

Festive French Toast


Ah, December: my favorite time of year! For so many reasons:

  • the end of one year, signaling the beginning of another
  • Christmas music!
  • Christmas shopping (I actually really enjoy that part!)
  • dreaming up Christmas lists
  • get-togethers with family and friends
  • special Christmas performances and concerts
  • ... and, of course, all the Christmas flavors, and the food, delicious food!
How about you? Do you enjoy December?

It doesn't really matter, I guess, because ready or not, here it is! And here we go, into the frenzied but fun mad rush of a holiday season, hanging on by the merest thread of our sanity. I love it! 

To celebrate the beginning of the season, here's a great recipe you can try any day of the week, for breakfast or dinner. If it's just too much to think about in the midst of all the craziness, save it for Christmas Day breakfast. 


But really, I promise: it is SO easy. All you need is some healthy bread (homemade or storebought, doesn't matter, but make sure it's whole grain), a few eggs, and some healthy eggnog (homemade or storebought: I paid way too much for a carton of the good organic stuff, but I just couldn't bring myself to buy those cartons with all the HFCS, preservatives, coloring, flavoring and whatnot). 

Seriously, it couldn't be easier: follow these directions for French Toast (or make them as you usually do), except swap out the milk for eggnog instead. See what I mean? Easy! A simple switch and you have a festive, ready-for-Christmas flavor that takes the ordinary into the realm of extraordinary. 

And perfect for December. 

You can top them with real maple syrup or honey, or to make them even more special, try enjoying them with this Cinnamon Syrup (I use 1 1/2 tsp cornstarch instead of the flour, and about 3/4 cup of raw sugar instead of the sugars). (Another fun idea would be cranberry sauce - not the canned kind.)

And for a really decadent breakfast treat, whip some cream up with another dollop of eggnog. I used about 1/2 cup of cream and a tablespoon of eggnog. Top with a dusting of cinnamon. 


This is just as QUICK as regular French Toast. Making the syrup and whipped cream yourself will add a little bit of time, but not much - 10-15 minutes at most. 

It's so EASY, too. Anyone can make French toast, and anyone can make Festive French Toast!

Eggnog is not exactly CHEAP, I'll admit. I paid more than I care to say for a small carton of the organic variety, but to be honest, regular conventional eggnog is not that much cheaper. Even if I made it myself, it would still be a seasonal luxury. But that's part of what makes it festive and fun!

HEALTHY really depends on the quality of the components you use. If you use regular old store-bought bread (especially white bread), Aunt Jemima-type syrup, conventional eggnog and whipped topping, it will most definitely NOT be healthy. However, if you use:
  • whole-grain bread w/o artificial ingredients (I used homemade oat bread)
  • maple syrup, honey, or homemade syrup
  • real whipped cream
  • and eggnog without artificial ingredients or extra sugar
it can be a relatively healthy meal when rounded out with plenty of fresh fruit. 

Enjoy; and Happy December!

Tuesday, November 30, 2010

How was Your Thanksgiving?


I hope you had a wonderful Thanksgiving Day and a great holiday weekend! I was able to spend some time with my sister and her family, and we had a lot of fun: Thanksgiving Dinner, Black Friday shopping, and then a visit to a train museum that was entrancing to both our sons.

We were responsible for preparing the entire Thanksgiving Dinner for the first time in our lives, even though we're both at least 30 years old! We both love cooking, though, so it was a lot of fun. It's a great privilege to be able to cook Thanksgiving dinner with my sister; one I don't take lightly.

(Note: Sorry about the picture quality. My camera went all funky over the holiday, so the pictures are terrible. It appears to have resolved its issues now, but too late for the Thanksgiving food pics...)


My sister had the hard task of making the turkey, and wow, she exceeded expectations! And her first time cooking a turkey too! She did a maple-flavored brine, which was so delicious: flavorful and moist.

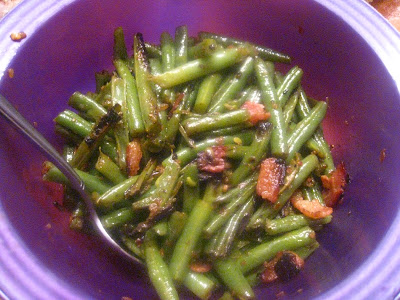
She also dressed up some green beans with bacon, and some seasonings and butter. Yum!


The gravy was up to me, as my DH requires that gravy be served any time there are mashed potatoes and turkey. He will never let me forget the one year he spent Thanksgiving with my family and ... oh, the horror!... there was no gravy! Ever since then, it's been my job to make sure there is gravy on the table. I couldn't make it in the roasting pan, which is the traditional method, and ideal because it includes the flavorful browned bits in the bottom of the pan. All I did was use the juices from the pan, add some chicken broth so there was enough, and simmered it with a cornstarch/water paste. Because of all the flavor in the turkey, it was quite delicious gravy, and I have to say it was a pretty smooth texture, too.


As you already saw in a previous post, I made some roasted carrots and parsnips for one of the sides. I had to reheat them in the microwave because the oven was busy, so they ended being not as crisp as they would have been otherwise. Also, I felt they could have used more cumin; I should have added a little extra before reheating them.


I also made my Mashed and Squashed Potatoes. I forgot my potato ricer, so the texture was not what I was hoping for, but the flavor was good.


My sister made a family tradition: Old-Fashioned Pan Rolls. We were a little crunched for time, so they didn't rise as long as they usually would, but they were still fantastic.


I also made my Cinnamon Sweet Potatoes, always a big hit with my Certain Little Someone!


 And here is my sister's Corn Pudding/Casserole, which was very good.


And her delicious fruit salad, which had a dressing made with orange juice, red wine vinegar and olive juice. Delicious!

Whew! That was a lot of food! We were quite stuffed after all of that, so we all took a nap, and let it settle in before we enjoyed dessert (with spiced cider, of course!).

First off, an allergen-free pumpkin pie! No one should be excluded from dessert!


My sister made a White Chocolate Cheesecake that we will all be raving about for years to come:


And the selection was rounded out with a 3-layer Pumpkin Cake with Cream Cheese Frosting, made by yours truly. I actually found it was better after a day or two in the fridge.

What about you? What was on your Thanksgiving plate this year?

Saturday, November 20, 2010

Loose Ends and Whatnot


I'm stuck at the moment. My refrigerator is almost completely bare, and I have limited time to do my grocery shopping this weekend. Which scares me a little (or a lot) because next week - next week! - is Thanksgiving already. I am supposed to make sweet potatoes, carrots, spiced apple cider, mashed squashed potatoes and pumpkin pie, and I do not have any:

  • sweet potatoes (well, I do, but I need to cook them up now, they won't last until next Thursday)
  • carrots or parsnips (see below)
  • apple cider
  • pumpkin
  • potatoes or cooked squash
Yikes.

If you are as unprepared as I am, hopefully this will make you feel a little better about yourself. And I guess you and I will be joining the throngs of Thanksgiving food shoppers this weekend. Joy, joy. 

The good news is that I am also supposed to make gravy, and I'm all set for that. At least my DH will be happy

And the other good news is that I did find a recipe for carrots (you were worried that I wouldn't, weren't you?) in a recent Woman's Day magazine. I have never made it before, but thankfully, it comes with the timely suggestion that it can be made up to 2 days ahead and re-heated in a 375F oven. Perfect! I can make it  ahead so I know if it turns out or not, and also I won't be quite as crushed for time on the actual big day. Very Important! I also love that it uses parsnips together with the carrots, and cumin, one of my favorite spices. Another big plus: it's allergen-free, so my Certain Little Someone can enjoy it as well. Which is good, because he really loves carrots, and I want him to enjoy his Thanksgiving dinner, too.

Stay tuned next week, because I'm hoping to post both my experiment with the above carrot recipe, as well as my recipe (loosely termed) for spiced apple cider before Thanksgiving actually happens. 


And right now, head on over to Our Peaceful Home, where Becky has graciously allowed me to guest post today. You'll find there the recipe for a super-easy, no crust pumpkin pie. I better go buy some pumpkin (or squash!) so I can make it myself...