Hey Ladies and Gents....
I was totally not intending to do it this soon (the new site isn't quite
ready yet!), but I ran out of picture space on Blogspot here (didn't
even know you could do that!), so it's really very urgent that I move
NOW. So pardon the dust, but please do check out my new blog design and
site, especially because I have a very special Valentine's Day post for
you to enjoy.
You'll find it here: http://www.quickeasycheaphealthy.com.
If you are subscribed here, you will want to re-subscribe at the new
address... but not yet because the button isn't ready yet!!! Like I
said, pardon the dust!
Tuesday, February 15, 2011
Thursday, February 10, 2011
Dessert for Two

My favorite way to celebrate Valentine's Day is to pull out all the stops and make a delicious as-close-to-gourmet-as-I-ever-get meal that's more expensive and indulgent than our usual fare, and to finish it off with an amazingly impressive and definitely chocolate dessert. I like to wait until the kids are in bed, light the candles and dress the table for an elegant, intimate meal.
Not that I get to do that every year. Sometimes life intervenes, like this year. We will be traveling this weekend to attend my grandfather's memorial service, and won't return until late Sunday. Monday will be spent unpacking from the trip and trying to re-immerse ourselves in the daily grind, so I won't have time to go grocery shopping and I certainly won't be in the frame of mind to pull together a gorgeous meal the following day.
I'll save it for our anniversary later this month.
In the meantime, I'll share with you the dessert I would make if I was making a fabulous Valentine's Day meal this year. This dessert looks impressive, tastes dee-vine, and best of all, takes only 15 minutes of your time. Oh, and it's a whole lot easier than it looks, especially if you make it my way. You'll find vastly more complicated recipes, but they make it way harder than it has to be. Trust me; this is the way to go.
Chocolate Lava Cakes
4 TBSP butter
1/3 cup semi-sweet (or bittersweet) chocolate chips (or chopped chocolate)
1 egg
1 egg yolk (freeze the white to use another day)
2 TBSP sugar
1 TBSP flour
Melt the butter and chocolate in the microwave, stirring at 20-second intervals. In a medium bowl, beat the eggs and sugar until it thickens slightly and lightens in color.

Beat in chocolate/butter mixture and flour until well blended and smooth.

Divide the batter evenly between the two ramekins. Bake at 425F for 8-10 minutes, or until the edges are set and the center is still a little "jiggly". (At 8 minutes, mine were probably slightly underdone, but still edible and presentable.)
Remove from oven and allow to cool for about 15 seconds. Run a knife around the edges to loosen the cake.

Carefully invert the cake onto the dessert plate. Place your dessert plate on top of the ramekin while holding the ramekin in your right hand. (I'm not holding it here because I was taking the picture, but you get the idea!)

Place your left hand on top of the dessert plate...

...and flip so that your right hand is now on top. Set it down on the counter....

...and carefully lift off the ramekin.

And there's your lava cake!

You can garnish your lovely little cakes in a multitude of ways. Here are a few ideas:
- fresh berries, especially strawberry or raspberry
- mint leaves
- a dollop of whipped cream
- a scoop of ice cream
- chocolate shavings
- powdered sugar
I garnished mine with dried coconut strips which is what I had in the cupboard; they turned out beautifully!
What can be QUICKer than 15 minutes? Not much! Besides which, you can make the batter up to a day ahead and bake the cakes right before serving.
I think you will agree that this is pretty EASY, especially considering how fancy and difficult it looks.
Making individual servings like this makes it a CHEAP
choice; no waste! I can't tell you how many times I've thrown away cake
because we just don't eat it a lot. This is a much better route to go.
HEALTHY? Well, it's dessert, what can I say? And
certainly not the healthiest dessert I've ever come across. You can
increase the nutritional value by choosing quality ingredients: dark
chocolate, pastured eggs, raw sugar and real butter. I wasn't brave
enough to try whole wheat flour, but I bet white whole wheat would work
in this recipe. (If you try it let me know! I was afraid it would affect
the texture too much.)
Saturday, February 5, 2011
Super Bowl Food for the Non-Fan
There are two kinds of people:


- The kind that go to a Super Bowl party for the football.
- The kind that go to a Super Bowl party for the food.
I suppose you could argue that there are subsets of both
groups, such as those who only go to watch the commercials, or those who
only go because it's really the only thing going on that particular
Sunday night. At any rate, I am firmly planted in group #2. And proud of it!
Forget the football. Bring on the food, baby!
Hence, I bring you an appetizer that is definitely not
meant for the dedicated football fan, but for his/her foodie guest. When
I made them and told my DH they were for a Super Bowl appetizer, he
said (and I quote), "Yeah, right." He is firmly planted in group #1.
Who cares if the real fans don't appreciate these delicately
crispy, lightly salty, and oh-so-good snacks? They weren't intended for
them anyway; they are strictly just for us. You know, the food fans.
Would you believe me if I told you these gourmet-like crisps
are super easy? And super quick? Read on, and perhaps I can convince
you.
The recipe doesn't contain measurements because it really
doesn't matter. You can have as little as 1 TBSP of shredded parmesan,
or as much as 3 cups. It all depends on how big your block of Parmesan
is, how long you want to spend grating it, and how many foodie friends
you have.
The only thing that's really necessary is that you do indeed
begin with a block of Parmesan and grate it yourself. Probably some
freshly grated Parmesan at the store would be OK, but I really think
it's better to grate it yourself.
Parmesan Crisps
shredded parmesan
freshly ground black pepper
Place the shredded parmesan 1 TBSP-full at a time on a silicone- or parchment- lined cookie sheet. Sprinkle with black pepper.

Bake for 5 minutes at 400F or until the cheese is melted and the edges are golden crispy.

Allow to cool, then carefully remove from the cookie sheet and place in serving dish.

Most people say these are best served the same day they're
made, but I actually think they are sturdier and crisper the next day.
They didn't make it any farther than that around here....
Of course, you can use different seasonings, by the way. I
like the simple subtlety of the black pepper, but spicy seasonings like
cumin or red pepper flakes would be delicious, as would more Italian
herbs like rosemary or basil. Try them all and see what you like best!
These also work great as a delicious accompaniment to soup or salad.

So QUICK: 10 minutes or less for one
cookie-sheet-full! You definitely have time for that, especially since
that small amount of time is so well invested in deliciousness like
this.
Can you grate cheese and dump it on a pan? Then you can make these. EASY-Peasy!
CHEAP, on the other hand, is debatable. If you're
making a batch large enough to feed a lot of guests, it will take a
large amount of Parmesan cheese, which gets expensive. However, if you
just make a few as a garnish, or as part of a platter of other
appetizers and noshy stuff, the expense is minimal. It doesn't take much
Parmesan to make a TBSP worth of shredded cheese.
It's very HEALTHY, too! Cheese is a great source of
protein and calcium, of course, but also vitamins B and A, among other
things. So enjoy guilt-free!
Wednesday, February 2, 2011
A Super Bowl of "Chips" and Dip!

I say "chips" because I don't want you to think they will be exactly like those fatty, crunchy discs you pull from the foil bag. Nope, they're better! Not quite as crunchy - hence the quotes - but twice the flavor. Don't believe me? Try them and see!
Better-Than-Chips
2 medium potatoes
1 TBSP olive oil
salt & pepper
Wash the potatoes thoroughly and peel if desired. Slice thinly (use a mandolin slicer if you have one), but not too thin (you don't want the slices to be transparent). Drizzle the slices with the oil. Generously grease a cookie sheet with more olive oil and lay the slices on it in a single layer. Sprinkle with salt and pepper to taste. Bake at 400F for 20 minutes, or until edges are browned.
I chose to stick with the simplicity of salt and pepper because I knew I was going to make the dip below to go with them, but these can be seasoned in an infinite variety of ways. Use a seasoning blend or try your own favorite herbs and spices. I'll probably experiment with quite a few myself and post them as I try them. Let me know how you flavor yours!

Chips have to go with dip, at least I think so. Unfortunately, most dip is just as fattening as the chips, and full of unnecessary ingredients. Try this dip, instead, that uses yogurt as a base. Use Greek yogurt, or strain regular yogurt in a mesh sieve lined with cheesecloth or the like.
Ranch Dip
1/2 cup Greek or strained yogurt
2 oz. cream cheese, softened
1/4 cup heavy cream, mixed with 1 tsp lemon juice
1 tsp dried parsley
1/2 tsp dried dillweed
1/2 tsp sea salt
1/4 tsp freshly ground black pepper
1 clove garlic, minced
Stir together the yogurt, cream cheese, and heavy cream until thoroughly blended. Mix in the spices. Refrigerate a couple hours before serving (ideally).
These chips are pretty QUICK, considering they were done, start to finish, in under 30 minutes. Just as quick as going to the store to pick up a bag! And the dip is super fast, aside from the refrigeration time, which isn't 100% essential.
They are pretty EASY, with some qualifications: you have to slice them just the right thickness, and you have to cook them just the right amount of time.
Definitely much CHEAPer than buying a bag at the grocery store! Two potatoes are mere pennies. OK, well maybe dimes.
And soooo much HEALTHY-er than the chips in the bag. And the dip in the plastic container, too. All good stuff here, nothing to feel guilty about while you watch the big game!
Friday, January 21, 2011
A Slice of Life... or Maybe Just Pizza

I wish I could share it with you in person; that would be so much fun, wouldn't it? But since we've already eaten most of it, I can't do that, so I'll just share it virtually instead.

Chicken Bacon Ranch Pizza
1 recipe Honey Whole Wheat Pizza Dough (or any other pizza dough)
1/4 cup Ranch dressing (try this healthy homemade version)
1/2 lb boneless skinless chicken breasts, sliced thin
1 TBSP olive oil
2-3 slices bacon, cooked and crumbled
2 cups shredded mozzarella cheese
handful of fresh chopped parsley
Roll the pizza dough out onto the pan. Bake at 375F for about 10 minutes or so. Remove from oven and allow to cool slightly. While it's cooling, cut the chicken into 1" or 2" pieces. Heat olive oil in a frying pan over medium high heat, and fry chicken pieces until golden brown on the edges. Spread Ranch dressing over surface of pizza crust. Evenly distribute chicken and bacon pieces on top. Sprinkle with cheese. Bake for 5-10 minutes, or until cheese is melted completely and crust is done. Remove from oven and top with parsley. Allow to cool slightly before slicing and serving.

I think some chopped red onions would be delicious on this pizza, and grated or finely chopped zucchini would add a nice crunch and some fresh garden flavor.
This is a great QUICK dinner for weeknights. I schedule pizza on the menu pretty frequently for this very reason.
It's also very EASY! It's hard to mess up pizza. If you're nervous about the dough, Trader Joe's sells a great ready-to-bake pizza dough that's worth a try. But really, pizza dough is not difficult to make - most recipes don't even require rising, or kneading or anything like that. And the flavor of homemade pizza crust is hard to beat!
The fact that it's CHEAP is another reason why it appears on my menu rotation frequently. Pizzas, like casseroles, are a great place to use up leftover meats, vegetables, and even fruits, depending on your tastes. You can even use leftover sauces or dips. The biggest expense is the cheese, but it's totally worth it.
Because it's made of wholesome ingredients, I consider it a HEALTHY meal option. Beware, though, that it packs a hefty calorie punch and is rather carb-heavy. Take that into consideration for your food intake during the day. And I would recommend eating 2 slices or less, and supplementing with a green salad.
Wednesday, January 19, 2011
Two for One: Chocolate Banana Cake and another Powdered-Sugar-Free Frosting!

My intention was to have two separate blog posts, one with the chocolate cake, one with the frosting, but the days just keep going by in a blur of diapers, feedings and naps and I haven't had a chance to sit down and write one post, let alone two. So here we are, with a two-fer!
First of all, the cake.
It's more than chocolate cake, it's chocolate banana cake. My sister thinks that's disgusting, but both my DH and I thought it was delicious. The use of the banana makes it so moist and adds another layer of sweet flavor. We normally never finish a cake before it goes bad, but we've already almost polished off this one!
Another plus is that it is egg-free, which is great if you avoid them or have allergies. Or if you don't have eggs on hand, which happens!

1 cup unbleached all-purpose flour
1 cup whole wheat flour
1 cup raw sugar
2/3 cup cocoa
1 1/2 tsp baking soda
1/2 cup butter, melted
1 1/2 cups hot water
1 tsp vanilla
1 cup mashed banana
Whisk together the dry ingredients in a large bowl. Add the melted butter, hot water and vanilla; stir well. Add mashed bananas and mix thoroughly until well blended. Pour batter into two greased and floured round cake pans. Bake in a 350F oven for 30-35 minutes or until toothpick inserted in center comes out clean. Allow to cool for 10-15 minutes, then invert pans and release cake. Cool completely before frosting.
Aside from the extra step of mashing the bananas and melting the butter (neither of which takes longer than a minute), it's just as QUICK as a box mix.
It's also just as EASY as a box mix. Mix the dry ingredients, add the wet ingredients, stir, bake. What could be easier?
It's CHEAPer than many cakes because it doesn't require eggs. Doesn't save you much, but hey, every little bit helps, right?
It's pretty HEALTHY as cakes go, with the use of partially whole wheat flour, as well as the addition of bananas. It uses the minimum amount of sugar for a recipe like this.
Now for the frosting....
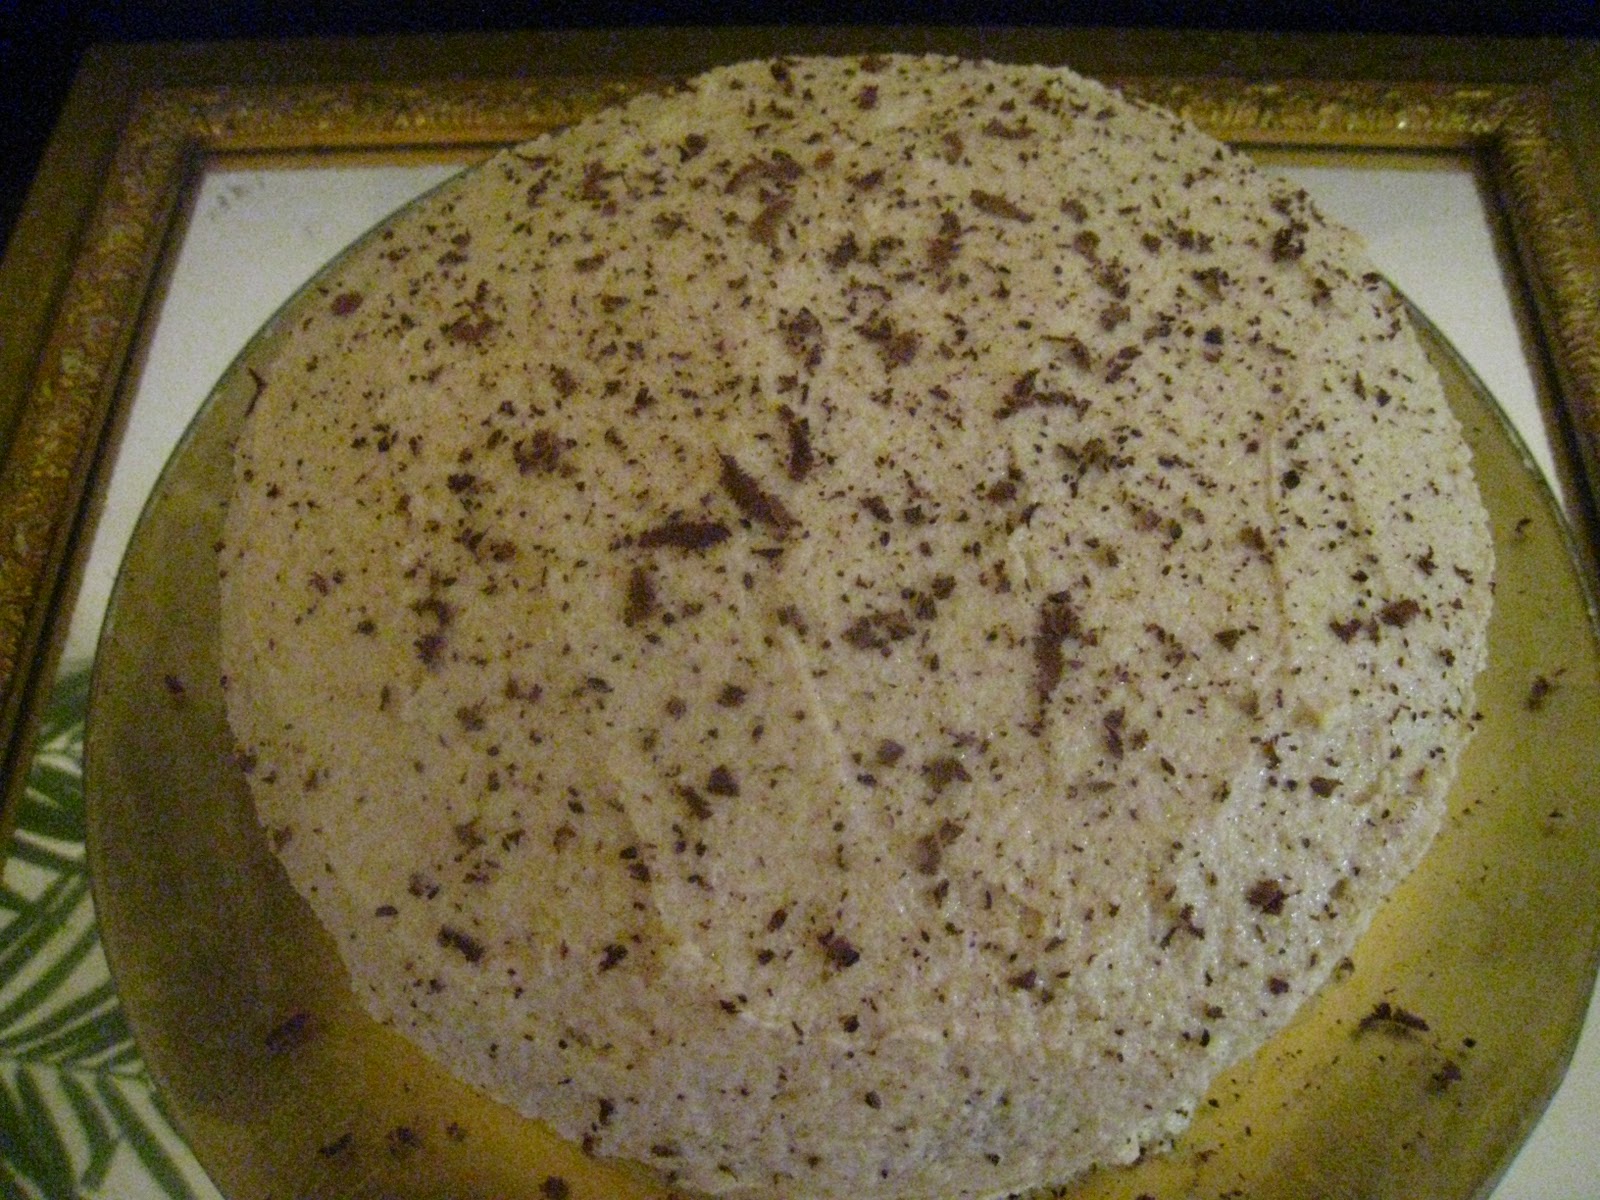
Knowing of my quest for powdered-sugar-free frostings (apparently, a quest shared by many of you as it is one of my most popular features ever), a friend alerted me to Flour Frosting. I had never heard of such a thing, but a quick google search led me to some great blogs and recipe sites that convinced me i definitely needed to try it.
I'll admit it's still a work in progress. Don't get me wrong; it tasted amazing, and the texture was so light and fluffy. It was like whipped cream frosting but... better! However, it looked a little grainy and slightly separated, and as I read more about it, I realized I should have beat it longer (which is contrary to what I would think, but that seems to be what everybody said would do the trick. So next time, I'll beat it longer! Also, I saw a couple different variations, and I think I will try them all and see which one I like best.
It's perfectly delicious as is, though, so I'm going to share it with you now. Now go eat some cake... without any powdered sugar!
Flour Frosting
5 TBSP flour
1 cup milk
1 tsp vanilla
1 cup butter
1 cup raw sugar
Whisk flour into milk in a medium saucepan until dissolved. Heat over medium heat, stirring constantly, until thickened. Cool to room temperature and stir in vanilla. Cream butter and sugar together until fluffy. Add milk mixture and continue beating until it resembles whipped cream. Frost.
This is not as QUICK as other frosting recipes, but the extra bit of time is definitely worth it.
Other frostings may be EASY-er and less finicky, but they probably don't taste as good.
This recipe uses basic pantry ingredients so it's fairly CHEAP. It does take a whole cup of butter, which can be pricey unless you get it on sale (I was stuck without enough butter, so I had to pay full price. I hate that!).
Frosting recipes aren't really HEALTHY, but this one's not bad. It's definitely a lot better than the frostings that come in the little cans, and because it doesn't have tons of powdered sugar, it's healthier in that respect as well.
Friday, January 14, 2011
Winter Warmth in a Mug

Usually, my go-to hot drink is coffee, followed very closely this time of year by hot chocolate. Hot tea is a distant third and the occasional hot simmering cider is always a nice treat. Hot milk, though, has never been in my repertoire of hot drinks.
Until now.
Now it's one of my favorites, right up there with hot chocolate. Easier, though, to make from scratch (although making hot chocolate from scratch is not super difficult) and in a jiffy. And soooo soothing... you might fall asleep immediately after imbibing!
If you are one of the (un)lucky ones who have been dumped on liberally by snow this year (I'm one of the very lucky ones who has managed to miss it all for the most part!), you will want to keep this recipe handy and make sure you have plenty of milk in your fridge for the next snow storm. After a round of romping through the white stuff, this hot white stuff will hit the spot!
Soothing Hot Milk
1 cup whole milk
1 TBSP honey (or to taste)
1/8 tsp cinnamon
dash of grated nutmeg
Place all ingredients in a microwave-safe mug. Heat for one minute and 30 seconds or 2 minutes. Stir until honey is melted and spices are incorporated. Sip and relax!
You can also make this on the stove-top simply by placing all the ingredients in a quart-size saucepan and heating over medium heat, whisking constantly until it bubbles around the edges.
You can vary the flavorings to suit your taste: add a little vanilla extract, or try some more exotic spices like ginger or cardamom.
This is one of the QUICKest homemade hot drinks, just as quick as a packet of hot chocolate or hot tea.
It's also super EASY! Can't go wrong with this one!
It's just as CHEAP as making hot chocolate from scratch (which requires milk), but not as cheap as hot tea or coffee because it's mostly milk. If you don't mind buying a little extra milk, or cutting back your milk consumption in other areas, this is not a bad deal.
It's very HEALTHY! You can't get too much more straight-forward than these ingredients, all very beneficial each in their own way. Honey is still a sweetener, so it's important to remember that, as healthy as it is, you should still limit your consumption of it. However, in my opinion, it's the healthiest sweetener possible, and ideal for hot drinks.
Thursday, January 6, 2011
Labor and Delivery, the "QECH" Way
 |
| My DH, my Certain Little Someone, and Baby Boy - aren't they precious? |
Some of you are probably nodding your heads and saying "Good for you!". The rest of you are probably scratching your heads, rolling your eyes and saying, "Why the heck not?!"
Oh, I'm glad you asked!
Believe it or not, the reasons behind my decision not to have an epidural fall within the same principles that govern my overall approach to food, nutrition and health: what is QUICK, EASY, CHEAP and HEALTHY (with as NATURAL as possible thrown in there for good measure).
Note: I am no doctor and no midwife; all the information I share below was gleaned from the multitude of books and articles I read prior to the delivery of my first child, my own experience, and the experience as shared to me by many other moms, some who had an epidural and some who did not.
So why in the world would I consider a non-medicated labor to be "QECH"?
Studies have confirmed over and over again that non-medicated labors generally proceed more QUICKly than those treated with pain medication, especially those where the epidural is given before active labor has really begun. I know so many moms whose labors were progressing in a normal time frame, but stalled as soon as the epidural was given. Most of the time, oxytocin is required to re-start the labor, and in worst case scenarios, the delivery ends in a C-section. On top of that, depending on the strength of the epidural and the skill of the anesthesiologist, a mother may not feel the natural urge to push, which will considerably lengthen the pushing stage.
From my own personal experience, my first labor lasted less than 14 hours start to finish, and the sum total of pushing time was 30 minutes. With my second, the entire labor (excluding the lengthy week of pre-labor that I endured before active labor finally started) was less than 8 hours, and only 9 minutes of pushing. This is not the experience of all women, of course. Sometimes unmedicated active labor can last so long that the mother is exhausted, and in those cases, it can be helpful to have an epidural just so she can relax and regain her strength.
Based on what the nurses were telling me during my postpartum care, recovery from a natural delivery is also QUICKer than that of a medicated one. Because I had no epidural, I needed very little intervention even immediately after the birth, mostly because I could move around of my own accord. There were also other precautions and measures the nurses realized they didn't have to take when they saw I had not had an epidural.
No labor is ever EASY, medicated or not! It's certainly not a walk in the park. However, there are a host of medical interventions that have to take place whenever the mom is given anesthesia, and all of them can complicate the birthing process:
- possible catheterization
- additional monitoring
- the mother's position restricted
- prohibition of food or drink, and the use of IV instead
Each of these things is a complication in and of itself and can lead to further complications both during and after the birth.
Depending on how your insurance is structured, foregoing the epidural can be much CHEAPer.
In our case, we pay 20% of whatever the insurance company pays, which
means that if they paid $1500 for the epidural and the anesthesiologist,
we would pay $300, a hefty sum for a medically unnecessary treatment.
The use of the epidural in and of itself is not likely any more or less HEALTHY
than going without. It's all the accompanying measures I spoke of
before that can create an unhealthy situation either during or after
delivery. For example, catheterization can lead to UTIs. The use of an
IV can create excessive swelling. A mother's position being restricted
and/or additional monitoring can inhibit the natural progress of labor,
resulting in more and more medical interventions.
There do seem to be some HEALTH benefits for the baby
when anesthesia is not involved in the labor process. For one thing, in
unmedicated labors, endorphins can be found in the placenta and
umbilical cord, which helps the baby through the delivery process as
well. And because the medication in an epidural reaches the baby as
well, unmedicated babies are more alert and active immediately after the
delivery, which helps with bonding and learning to suck and eat
(important survival skills!).
Saturday, January 1, 2011
What better way to bring in the New Year

This is why I haven't been posting much this past week... and why I won't be posting much next week either. I have a feeling I won't be spending much time in the kitchen.
But I won't be able to stay away from it for long, either! And I have some great ideas for this new year, so I'll be back in full force in the very near future. Stay tuned!
Subscribe to:
Posts (Atom)